Showing posts with label experiment. Show all posts

April 23, 2008

Waiting for the snow to disappear

This time of year is the least fun season in Tromsø. Knowing it is spring further south, makes it even more depressing to look outside and see snow everywhere. It varies from year to year when spring decides to show up. Anything from early April to early June is normal. This year it seems to become a late spring. The last weeks we've experienced 20-30 cm of snowfall on a daily basis. Luckily some of it thaws during the day, but we've gotten our share of excersize showeling snow.

One of the reasons I want a snowfree environment, is my discovery of a cool experiment in November last year. A couple of days before the winter kicked in, I learned about the micrometeorites. Dust from space fall to earth, tons of it every day. But every individual piece of stardust is too small or almost too small to see for the human eye. But with a magnification of just 20, they are easy to identify.

The meteorites we are talking about here are the iron-containing ones. When they enter the atmosphere, they melt and get a characteristic round shape which is easy to identify in a sample.

NASA and others have published lots about the topic, including photos and how-to's. The way I search for the extraterrestrial dust is the easiest one, I think. I use two plastic cups. Inside one of them I put a strong neodium magnet. The second cup I place on top of the magnet, locking it between the two cups. Then I tie strings to the cups in a triangular shape, allowing me to walk straight and hold the cups just centimeters above the ground. With this you're ready to hunt for the stardust, taking your cups for a stroll or three. The micrometeorites will be attracted to the magnet and stick to the bottom of the cups. To check if your sample contains the round beads, transfer it to a post-it note and look at it with 20x magnification or more. Good luck hunting!


August 26, 2007

Make a glowing tomato

I just saw this amazing video made by The Shooting Eggs Production, and I can't wait to try it for myself. It does not look like a fake to me. It requires three household chemicals, match phosphorus, bleach and hydrogen peroxide. The chemicals have to be strong, though (according to a comment to the video), so take care with your hands and your eyes if you want to give it a go.

April 18, 2007

Computer controlled small scale greenhouse

A project I have wanted to test for some time now, is developed by Dag Atle Lysne, Bjørn Tore Esjeholm and Stig Misund at the Finnmark University College. By using the Robolab products from Lego, you can build and program an automated small scale greenhouse. According to the developers it requires about 12 hours to complete this process. After finishing the building and the programming, this greenhouse is a nice tool to sample various plant growth information. The project description of the greenhouse project is in Norwegian, but I can translate it if anyone wants it in English.

I have discussed this project with author Dag Atle Lysne, and he had several suggestions to alternative materials and programming tools. By using Lego bricks, there are some problems with the door solution. The door tend to become either to heavy for the motor or not solid enough to tolerate the frequent opening and closing to regulate the heat. Lysne suggested using other materials like wood, metal, plexiglas or plastics to lower the weight, and combine it with some Lego components.

He also told me he had tried using other programming tools, to increase the difficulty level and gain experience with other tools than Robolab. I do not know which tools he referred to, but I will try to figure it out if anyone are interested.
[Update: A friend of mine, Rob, has written a post about our science center, and suggests some other tools for programming. Thanks!]

April 12, 2007

Watch life form before your eyes

In the early nineties I took a university class in cell biology. We had an inspiring professor named Finn Haugli, and his student labs excelled beyond comparison. The lab I loved the most, was the one about embryology. Using the sea urchin as a model system, we collected eggs and sperm. While looking at it in the microscope, we fertilized the eggs with the sperm and saw the embryo form before our eyes. Remarkable!

Years later I taught the same course at the university myself, and used the same experiment with my students. It requires some labour from the teachers, to purchase the animals and keep them alive, but the experiment itself is simple. I used the procedures described by Leland Stanford Junior University, with some minor modifications. We used the local species of sea urchin; Northern Sea Urchin/Drøbakkråkebollen Strongylocentrotus droebachiensis, and the local sea water temperature. This actually made it easier for us, we could use the fridge as an incubator. The temperature is crucial, if it is to warm, the urchins spawn before you can start the harvest and if it is to cold, the gonads are consumed by the urchin itself. This species naturally spawn in spring. To get the animals you either have to scubadive for them, collect them at low tide or get them from a local sea water aquarium.

When performing the actual fertilization, you need to be patient. The embryo forms quickly, but you have to wait patiently for the cell divisions. The species we used needed 2-3 hours before the one cell became two, and so on. It varied a lot between the individual embryos, but it is worth waiting for, to see a cell split into two and two split into four. There is nothing like it!
Leland Stanford Junior University has an extensive website with all the information you need to try the experiment yourself, called Sea urchin embryology. On their pages they write

Gametes of sea urchins yield exceptional experiences in the classroom; teachers and students alike are riveted by being able to observe fertilization, cell division and embryonic development. The gametes are easy to use, the developmental stages are readily seen with the microscope and the rapidity of fertilization and early cell divisions allows the student to ask questions and obtain answers within the bounds of a normal classroom schedule.

They have also started making an virtual lab site. Although it is not completed yet, there are plenty of high quality activities there. The site is called Virtual urchin website (requires Flash), and is also linked from the mothership.

The code of all living things

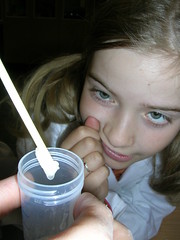
Although we learn that all living things contain DNA, it might seem a bit to abstract to many kids. And when we think of DNA, we picture the beautiful double helix, right? Well, it does sort of look like that, if we view it through the best microscopes there is. But if we look at it with our bare eyes, it looks more like snot. Or a blob, if you like. If you do not believe me, check it out for yourself. Exploring this fact is very easy, it is maybe one of the simplest experiments there is. There are many different protocols that work in the same manner.

I have had success with the ingredients mentioned below, and the procedure (in Norwegian) can be found at Nysgjerrigper.no (written by Hanne Finstad).

a sample of something living
cold water
salt (NaCl)
detergent (soap of some sort, containing sodium lauryl sulphate)
bicarbonate
isoprophanol

There are plenty of good resources on this in english too, the research language above all. I have probably only seen a small percentage of them, but here are a few excellent sites:

How to extract DNA from anything living The University of Utah (with a funny twist)
DNA extraction The Gene School (good explanations)
How to extract DNA from fruits Fun Science Gallery (descriptive photos)

April 05, 2007

Balloon hoover craft

Here is another funny experiment for you! It is a great activity at birthday parties, both for kids and adults. And it is a nice ice breaker or a fun way to start a lesson about gases or air. As many as 10-15 kids, depending on weight of course, can stand on the table before the balloons start to explode.

Here is what you do: Inflate lots of balloons to the same size. Turn a table upside down and place it on top of the balloons. One by one, step carefully onto the table, make sure to keep the table in balance. How many can you cram onto the table before the first balloon pops? Let me know!

It is a nice demonstration of the strength of air and it can be compared to the tires of cars, filled with air and withstanding the weight of several tonns.

April 03, 2007

The Mentos and Diet Coke Geysir

Last week touring the local schools in the Harstad-area, I demonstrated the Mentos eruption as part of the theme solids, liquids and gases. The experiment is simple; make a tube of paper where you can stack a handful of Mentos and place a card underneath the tube. Place the tube and the card on top of an opened Diet Coke (or similar), remove the card and see the Mentos fall into the soda. Evacuate the site and watch the geysir burst into the air.

The phenomena was first demonstrated by Steve Spangler, a science educator and television host from USA, back in 2005 and has since become a TV and internet phenomena. Steve Spangler lauched a geysir reaching 5. 5 m using a 2 litre coke bottle, live on TV. TV-shows like the Letterman Show and Mythbusters has blown away multiple bottles of Diet Coke, and lots of videos showing the eruption are posted at YouTube. Even at Flickr there is a group called Planet Mentos. Today's record is 10.4 m, set by the Mythbusters. They demonstated that freezing the Mentos increased the effect, because gum arabic expands when frozen, the mentos become more porous and cause the reaction to speed up.

Although many might think it is a waste of soda and candy, there is some good science in there. Who has not seen the bubbles formed in the soda when something is accidently dropped into the glass? When using the Mentos candy, you see the extreme version of the same phenomena.

The gas is trapped in the soda due to the water molecules. When Mentos is dropped into the Diet Coke, the gelatine and the gum arabic coating dissolves and breaks the surface tension of the soda. The mesh of water molecules is disturbed and the carbon dioxide easily form bubbles. Mentos has thousands of tiny pores on their surface, and these function as nucleation sites where the gas bubbles form. As the rather heavy candy falls to the bottom of the bottle, carbon dioxide is released and the suddenly increased pressure pushes the liquid out of the bottle.

As I discovered on my tiny tour, this experiment create enormous amounts of enthusiasm and curiosity among the kids. I encouraged them and their teachers to continue experimenting with this; trying other types of soda and Mentos, other candies and heavy oval objects, and varying the number of Mentos used. Exploring which ingredients causing the effect, is scientific investigation in it's full extent. I am awaiting feedback from the kids in the Harstad area, and hope others also wish to try this fun backyard experiment.