April 27, 2007

Speedmonster, the toy that sparks creativity

Technology and design is a new topic in the school curriculum here in Norway. At the Science Center we have a toy construction activity for the mid-level classes called Speedmonster. The activity is designed by Elisabeth Kanebog and Marte Karidatter Skadsem, as a collaboration between "Den kulturelle skolesekken" and the Science Center. Elisabeth is an art teacher excelling in design and the design process and Marte is our tech expert in the house. Speedmonster is partially based upon old mechanical toys and the activity is divided in three parts;
  • learning the history and technology of toys
  • learning and doing the design process
  • making, testing and improving the toys
The Speedmonster is a half sphere made from Cernit clay (or similar), with a hole either at the front, the top or the back. Use a small bowl (8-10 cm across) underneath to get the shape right. Cut away excess clay and make sure you have a thicker layer of clay on the sides, to fit the two screws placed on each side underneath the shell, before the shell is baked in an oven. The shell will crack if you try to screw the screws into the clay after it has hardened in the oven.

As you can see on the photo to the right, the mechanichs is a set of wheels with a small piece of wood glued between them. The wheels are attached to the monstershell via rubberbands, glued to the wheels as well. To make sure the rubberbands are firmly attached to the wheels, put a matchstick with glue on in between the two rubber ends. After the glue has dried and hardened, cut off the part of the matchstick sticking out of the wheel hole.
Tie a piece of thread onto the wheels and push the end out of the hole you've drilled in the shell. Attach a small object to the end of the thread, preferably something you've made of the clay, fitting your Speedmonster design.
If you have problems making the Speedmonster walk properly, cut small bands out of a balloon and make rubber tires on the wheels. And if you still can't make it walk, improve your design and make another one! Be creative!
The activity has been a huge success for us, and all the kids have loved it, even if some of them left us with a broken, non-working toy. Their designs have been very creative, it is amazing what they produce. We will continue having the Speedmonster on our activity program, and will offer this to the local schools next spring. If you are interested in more information about the Speedmonster, and live outside Tromsø, I'd be happy to let you in on our tips and tricks, as well as the design protocol.


April 22, 2007

Earth Day and World Environment Day

Today the 22nd of April is Earth Day, and has been so since 1970, when it was initiated by Gaylord Nelson, a United States Senator from Wisconsin. (Not to be cunfused with the United Nations Earth Day, celebrated each year on the vernal (March) equinox.) According to Wikipedia April 22nd is celebrated by 500 million people in 175 countries. I must admit, I had not heard of the day until today. Reading the news of a Norwegian newspaper, I became aware of the way Google celebrated the day. Their logo today is a sinking iceberg, and by clicking the logo you get a list of hits as if you had seached for "Earth Day". Top ranked is the Earth Day Network, a nonprofit organisation coordinating the events worldwide. They use the slogan " A call for Action on Climate Change", and ask you to get involved in different ways. One is Project Switch, asking you to save energy by changing your inefficient light bulbs. They are also asking people to be Carbon Neutral, by "Reduce what you can, offset what you can't".

Carbon neutrality is a hot topic in Norway. Because of our oil production, we are one of the countries exceeding our emissions of carbon dioxide as decided by the Kyoto-protocol. This is something we are not willing to accept anymore, with Gro Harlem Brundtland as one of our former Prime Ministers we wish to aim higher. Brundtland was Chair of the World Commission on Environment and Development (WCED), referred to as the Brundtland Commission, developing the political concept of sustainable development and published its report Our Common Future in April 1987.

After releasing the 4th Assessment Report by the Intergovernmental Panel on Climate Change in February, the awareness of the consequences we are facing has hit the ceiling. Everyone is talking about it here in Norway. Even our Prime Minister Jens Stoltenberg. A few days back he proclaimed that Norway would reduce the emission of carbon by 30 % by the year 2020 and become carbon neutral (100 %) by the year 2050. The last goal seem like a fairytale, but I am proud that we have a government that finally has understood the importance of action to save our planet as we know it.

The Chairman of the 4th Assessment Report, Dr Rajendra K. Pachauri, is coming to Tromsø June 5th, which is the United Nations World Enviroment Day. Tromsø is hosting the main celebrations of the day, which is commemorated each year on this date. This year the agenda is "Melting Ice - a hot topic?". In Tromsø there will be a conference and many other events focusing on the topic. The Science Center is going to participate, teaching children about ice the whole "Environment Week".

Wherever you are, you should celebrate the day. The topic is to important to leave unnoticed. UN are suggesting 77 ways of celebrating June 5th, by the World Environment Day Alphabet. And at the Science Center we know of more ways to do it. If you are interested in teaching this at your school, sharing this with your kids or just try it for yourself, don't hesitate to contact me.

April 18, 2007

Computer controlled small scale greenhouse

A project I have wanted to test for some time now, is developed by Dag Atle Lysne, Bjørn Tore Esjeholm and Stig Misund at the Finnmark University College. By using the Robolab products from Lego, you can build and program an automated small scale greenhouse. According to the developers it requires about 12 hours to complete this process. After finishing the building and the programming, this greenhouse is a nice tool to sample various plant growth information. The project description of the greenhouse project is in Norwegian, but I can translate it if anyone wants it in English.

I have discussed this project with author Dag Atle Lysne, and he had several suggestions to alternative materials and programming tools. By using Lego bricks, there are some problems with the door solution. The door tend to become either to heavy for the motor or not solid enough to tolerate the frequent opening and closing to regulate the heat. Lysne suggested using other materials like wood, metal, plexiglas or plastics to lower the weight, and combine it with some Lego components.

He also told me he had tried using other programming tools, to increase the difficulty level and gain experience with other tools than Robolab. I do not know which tools he referred to, but I will try to figure it out if anyone are interested.
[Update: A friend of mine, Rob, has written a post about our science center, and suggests some other tools for programming. Thanks!]

April 17, 2007

In desperate need of a coke crib

I visited a school out of town today. Anne and I went to Hamnvåg Montesorri school in Malangen, approximately two hours from Tromsø. We travelled with three topics in our car trunk, a give away geology collection, energy (Lego Education) and solids, liquids and gases.

The last topic required four bottles of Diet Coke, to have a geysir show once again. But as we saw when travelling with this roadshow in Harstad, the experiment suffer because of the travel requirements. The roads were bumpy and the bottles got tossed around back in the trunk, resulting in rather lame geysirs today. Lots of fizz got lost when opening the bottles, as if we had shaken the bottles or dropped them on the floor.

The children and their teachers were happy with the geysirs, they were spectacular enough for the young at heart, but Anne and I knew it could have been much better.

We need some sort of spring system to keep the bottles unshaken upon arrival, a Coke Crib if you like. If someone out there could come up with a device to fix this, we would love to hear from you.

April 15, 2007

Dig a hole to China, or?

It is a known fact that if you dig a hole straight down, you will end up in China. It is something we have learnt as children all over the western world, I believe. Without the hard labour, and not considering the melted magma you have to fight when crossing the core of earth, you can check this fact with this cool application made by Stienman/Micro Basics.
Considering that 70 % of the earth surface is covered with oceans, it might not come as a surprise that you will find it hard to hit land wherever you start digging. Only small parts of the landmasses are placed opposite land, like the southern part of South America and South-East Asia. If you start digging from Tromsø, where I live, you would end up midsea between South America, Australia and Antarctica. Very far from China! So who started this myth, anyway?

April 12, 2007

Our girls fix robots on their own

A few years back, at my former workplace, I had lunch with some of my colleagues. My memory can not recall the topic we discussed, but I mentioned my plans to buy Lego Mindstorms to my three-year old son. When hearing it two of my male colleagues (in their thirties) started to smile and asked simultaneously "When can I come for a visit? - to play!".

They are a part of the Lego generation, just as I am. I must admit, I still play with it. I play with my son, and I play at work. There are many like me out there. This winter we have been amused by an elderly man working at the University and sharing office space with us. He has bought two Lego NXT robots, to play with his grandson, and he enjoys it so much he keeps chatting about it all the time, with great enthusiasm. He makes us smile, and wish for many playful years ahead.

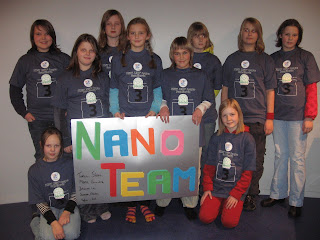
The Science Center organize the local First Lego League contest each year. Over the years we have observed the participating teams and seen a trend across the teams. They were all mixed teams with both girls and boys, and all collaborated in the same manner. The girls wrote the log and prepared the presentation, while the boys built and programmed the robot. Does it sound familiar?

Because of this we decided to gather our own team, girls only, and see if they took the front seat with the boys missing. So for the last two years we have organized and trained a girls-only team. All the other teams came from schools and could work on the project during school hours, while our girls had to work afternoons the whole two-month period. Despite their drawback of having less time available, they worked hard, had plenty of fun, gained new friends and learned lots about robots and programming. In 2005 they won the price for "Best collaboration" and last year they won the price "Best in show". I find it quite impressive, considering the hard competition they have had from teams with years of experience. Last year they ended as number seven, when six teams qualified for the final. Next fall we will set our goals higher, trying to focus more on the programming bit, to get a higher total score and get to the final. Because it is the robot and the programming that is most important in this contest, despite all the circus.

Watch life form before your eyes

In the early nineties I took a university class in cell biology. We had an inspiring professor named Finn Haugli, and his student labs excelled beyond comparison. The lab I loved the most, was the one about embryology. Using the sea urchin as a model system, we collected eggs and sperm. While looking at it in the microscope, we fertilized the eggs with the sperm and saw the embryo form before our eyes. Remarkable!

Years later I taught the same course at the university myself, and used the same experiment with my students. It requires some labour from the teachers, to purchase the animals and keep them alive, but the experiment itself is simple. I used the procedures described by Leland Stanford Junior University, with some minor modifications. We used the local species of sea urchin; Northern Sea Urchin/Drøbakkråkebollen Strongylocentrotus droebachiensis, and the local sea water temperature. This actually made it easier for us, we could use the fridge as an incubator. The temperature is crucial, if it is to warm, the urchins spawn before you can start the harvest and if it is to cold, the gonads are consumed by the urchin itself. This species naturally spawn in spring. To get the animals you either have to scubadive for them, collect them at low tide or get them from a local sea water aquarium.

When performing the actual fertilization, you need to be patient. The embryo forms quickly, but you have to wait patiently for the cell divisions. The species we used needed 2-3 hours before the one cell became two, and so on. It varied a lot between the individual embryos, but it is worth waiting for, to see a cell split into two and two split into four. There is nothing like it!
Leland Stanford Junior University has an extensive website with all the information you need to try the experiment yourself, called Sea urchin embryology. On their pages they write

Gametes of sea urchins yield exceptional experiences in the classroom; teachers and students alike are riveted by being able to observe fertilization, cell division and embryonic development. The gametes are easy to use, the developmental stages are readily seen with the microscope and the rapidity of fertilization and early cell divisions allows the student to ask questions and obtain answers within the bounds of a normal classroom schedule.

They have also started making an virtual lab site. Although it is not completed yet, there are plenty of high quality activities there. The site is called Virtual urchin website (requires Flash), and is also linked from the mothership.

The code of all living things

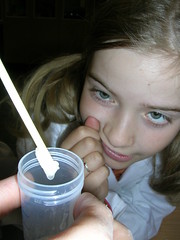
Although we learn that all living things contain DNA, it might seem a bit to abstract to many kids. And when we think of DNA, we picture the beautiful double helix, right? Well, it does sort of look like that, if we view it through the best microscopes there is. But if we look at it with our bare eyes, it looks more like snot. Or a blob, if you like. If you do not believe me, check it out for yourself. Exploring this fact is very easy, it is maybe one of the simplest experiments there is. There are many different protocols that work in the same manner.

I have had success with the ingredients mentioned below, and the procedure (in Norwegian) can be found at Nysgjerrigper.no (written by Hanne Finstad).

a sample of something living
cold water
salt (NaCl)
detergent (soap of some sort, containing sodium lauryl sulphate)
bicarbonate
isoprophanol

There are plenty of good resources on this in english too, the research language above all. I have probably only seen a small percentage of them, but here are a few excellent sites:

How to extract DNA from anything living The University of Utah (with a funny twist)
DNA extraction The Gene School (good explanations)
How to extract DNA from fruits Fun Science Gallery (descriptive photos)

April 11, 2007

Steady hand game, also known as Buzz wire game

At our latest science club for kids aged 9-12, our theme was technology and design. One of our activities was to make a steady hand game.

It turned out to be one of our most popular events ever, based upon the feedback we got from the kids and their parents. The parents were very impressed of what the kids had managed to build.

The games we made required cutting and shaping plastics, assemblying and soldering the electronics, and shaping and mounting the wire. With some help from the adults, even the youngest ones at 9 managed to make stylish looking, fully functioning toys. The games we made were based upon the instructions from a Norwegian book called "Trigger - teknologi og designboka" (2006) written by Eva Celine Jørgensen, Svein Briså and Rolf Ingebrigtsen.

If you want to make one of your own, and have problems with my native tongue Norwegian, do not worry! There are plenty of kits available at various internet stores; just google buzz wire game or steady hand game.

And if you want to do as we did; make it from scratch, there are options out there for you too. Here are a few, varying in difficulty level:

April 10, 2007

Northern Lights

As mentioned in a previous post, our Planetarium used to be a Northern Lights Planetarium, where tourists and locals could view the Aurora Borealis year around. Although it closed down in the late nineties, people still contact us and ask for the northern lights show. And at summer time, tourists come here with the same agenda. Unfortunately we have no show to offer them anymore. So we tell them to return in winter time to see the show for real. Because of our location at 69 degrees North, we have midnight sun two months each summer and the bright sky prevent us from seing the northern lights for approximately 4-5 months each year. Lots of tourist (mainly from Japan) do visit Tromsø midwinter to experience the northern lights dance across the sky. With a clear sky, the chance of seing the Aurora is quite good, and by checking the Northern Lights Forecast you can be prepared on what conditions to expect.

The first "waterproof" explanation of northern lights was suggested by Kristian Birkeland, a space scientist back in the ninetenth century. Because of his lifelong achievement he is displayed on our 200 Kroner note, as well as his Terella, on which he created the first artificial northern lights.

A friend of mine, Robert Burke, visited Tromsø in January and got some good photos of the northern lights display. He followed the instructions of Jan Curtis at Nature Photographers Online Magazine to optimize his camera settings.

Invent to learn

Until Easter we had the pleasure of hosting the exhibition Toy Tech, created by Invention Evangelist Ed Sobey at the Northwestern Invention Center. Ed is a remarkable man, and his "Invent to learn" philosophy is a learning strategy we found very intuitive and efficient.

Toy Tech is an active exhibition, where visitors can play with toys and view adjacent cut-always to see how they work. The exhibition includes some of “The World’s Greatest Toys” exhibit and a workshop. At the workshop visitors can make a variety of toys from inexpensive materials. They learn physics and building skills while becoming empowered to do more exploration. We used the "Invent to learn" philosophy at the workshop. The kids got a task to solve without getting an "instruction leaflet" from us. The idea is to learn by doing mistakes; make a prototype as fast as possible, then test it and correct one flaw at a time. Ed has written several books of this learning method, and I highly recommend two of his books entiteled Rocket-Powered Science: Invent to learn! Create, Build & Test Rocket Designs and Loco-Motion, Physics Models for the Classroom: 25+ Hands-On Projects.
[Update: The Toy Tech exhibition can be viewed at Jærmuseet, the Science Centre in Sandnes, from september. There is also an American version on tour, contact Ed if you want to know more.]

April 05, 2007

Balloon hoover craft

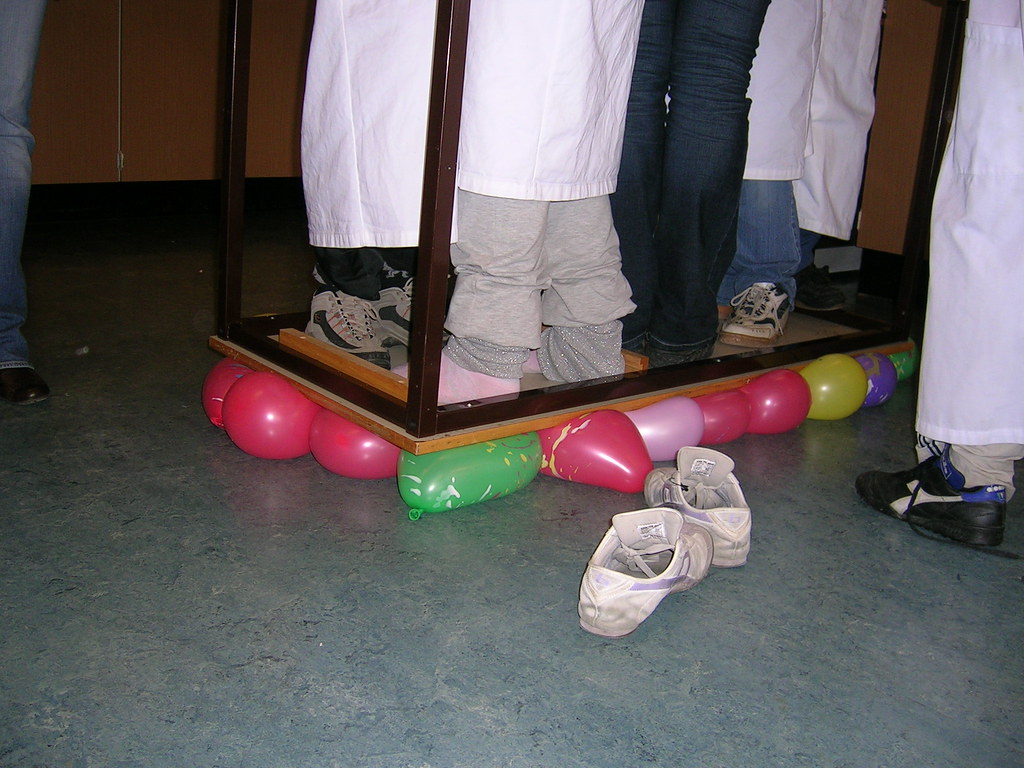
Here is another funny experiment for you! It is a great activity at birthday parties, both for kids and adults. And it is a nice ice breaker or a fun way to start a lesson about gases or air. As many as 10-15 kids, depending on weight of course, can stand on the table before the balloons start to explode.
Here is what you do: Inflate lots of balloons to the same size. Turn a table upside down and place it on top of the balloons. One by one, step carefully onto the table, make sure to keep the table in balance. How many can you cram onto the table before the first balloon pops? Let me know!

It is a nice demonstration of the strength of air and it can be compared to the tires of cars, filled with air and withstanding the weight of several tonns.

April 03, 2007

The Mentos and Diet Coke Geysir

Last week touring the local schools in the Harstad-area, I demonstrated the Mentos eruption as part of the theme solids, liquids and gases. The experiment is simple; make a tube of paper where you can stack a handful of Mentos and place a card underneath the tube. Place the tube and the card on top of an opened Diet Coke (or similar), remove the card and see the Mentos fall into the soda. Evacuate the site and watch the geysir burst into the air.

The phenomena was first demonstrated by Steve Spangler, a science educator and television host from USA, back in 2005 and has since become a TV and internet phenomena. Steve Spangler lauched a geysir reaching 5. 5 m using a 2 litre coke bottle, live on TV. TV-shows like the Letterman Show and Mythbusters has blown away multiple bottles of Diet Coke, and lots of videos showing the eruption are posted at YouTube. Even at Flickr there is a group called Planet Mentos. Today's record is 10.4 m, set by the Mythbusters. They demonstated that freezing the Mentos increased the effect, because gum arabic expands when frozen, the mentos become more porous and cause the reaction to speed up.

Although many might think it is a waste of soda and candy, there is some good science in there. Who has not seen the bubbles formed in the soda when something is accidently dropped into the glass? When using the Mentos candy, you see the extreme version of the same phenomena.

The gas is trapped in the soda due to the water molecules. When Mentos is dropped into the Diet Coke, the gelatine and the gum arabic coating dissolves and breaks the surface tension of the soda. The mesh of water molecules is disturbed and the carbon dioxide easily form bubbles. Mentos has thousands of tiny pores on their surface, and these function as nucleation sites where the gas bubbles form. As the rather heavy candy falls to the bottom of the bottle, carbon dioxide is released and the suddenly increased pressure pushes the liquid out of the bottle.

As I discovered on my tiny tour, this experiment create enormous amounts of enthusiasm and curiosity among the kids. I encouraged them and their teachers to continue experimenting with this; trying other types of soda and Mentos, other candies and heavy oval objects, and varying the number of Mentos used. Exploring which ingredients causing the effect, is scientific investigation in it's full extent. I am awaiting feedback from the kids in the Harstad area, and hope others also wish to try this fun backyard experiment.

My Science Center

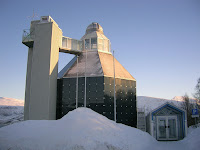
Nordnorsk vitensenter, where I work, was established in August 2002. The idea of science centres is rather new in Norway and the first centre was established in 1996. We are located at the former Northern Lights Planetarium, a spectacular building at the campus of the University of Tromsø. We love our Planetarium, although the building has some drawbacks. Our space is limited, and we have chosen to primarly work towards the schools, offering activites on request. To become the science centre we wish to, we need much more space. So we are trying to get fundings to expand on site from the present 800 square metres to approximately 3000 square metres. So if you have 60 million Norwegian Kroner to spare, please donate them to us!

April 02, 2007

Science minded

Who am I? My name is Mona Holmø, and I am a science centre teacher. My family claim I have one interest and one interest only. Although I could spend some energy protesting - I have passions enough to fill more than a lifetime - I can see their point. I am lucky to have a profession where I can explore the broad field of science and share it with those who are interested. Through this blog I will try to share with you all the things I explore and discover, both on and off work. Here we go!